The Ultimate No Bake Banana Split Cake Recipe for Effortless Joy
Table of Contents
Table of Contents
You’ve probably been there before—excited to create a beautiful dessert that will impress your family, only to have it collapse before it even makes it to the table. Perhaps your whipped cream melted into a soupy mess, the bananas turned brown, or your crust crumbled when you sliced it. It’s frustrating, and it makes you feel like dessert isn’t your thing.
But here’s the reassurance: this no bake banana split cake recipe changes that. With simple steps, a little patience, and a few key tricks, you’ll be able to serve a gorgeous layered dessert that tastes indulgent and looks like it took hours—without ever turning on your oven.
Ingredients at a Glance
This dessert layers creaminess, fruit, and crunch. To make it as straightforward as possible, here’s a complete list of what you’ll need.
| Ingredient | US Cups/Oz | Metric (g/ml) |
|---|---|---|
| Graham cracker crumbs | 2 cups (8 oz) | 225 g |
| Unsalted butter, melted | ½ cup (4 oz) | 115 g |
| Cream cheese, softened | 8 oz | 225 g |
| Powdered sugar | 1 cup (4 oz) | 120 g |
| Whipped topping (Cool Whip or fresh) | 16 oz | 450 g |
| Bananas, ripe but firm | 3 medium | ~350 g |
| Crushed pineapple, drained | 20 oz can | 565 g |
| Strawberries, sliced | 1 cup (6 oz) | 170 g |
| Maraschino cherries | ½ cup (3 oz) | 85 g |
| Chocolate syrup | ½ cup (4 oz) | 120 ml |
| Chopped nuts (optional) | ½ cup (2 oz) | 60 g |
🧰 Equipment You’ll Need
- 9×13-inch baking dish (23×33 cm)
- Mixing bowls (1 large, 1 medium)
- Hand mixer or stand mixer
- Spatula for spreading layers
- Fine sieve for draining pineapple
- Sharp knife for slicing fruit
- Measuring cups and spoons
⏱️ Prep time: 20 minutes
⏱️ Chill time: 4–12 hours
⏱️ Total time: About 4 hours 20 minutes (including chilling)
🍰 Yield: 12–15 servings
📈 Difficulty level: Easy
Step-by-Step Method (Easy Checklist)
No oven, no stress—just layers of flavor. Follow this checklist to assemble your dessert with confidence.
- Make the crust: Prepare the crust by mixing graham cracker crumbs with melted butter until evenly moistened, then press into your pan.
- Visual cue: Crust should look even and feel firm when touched with the back of a spoon.
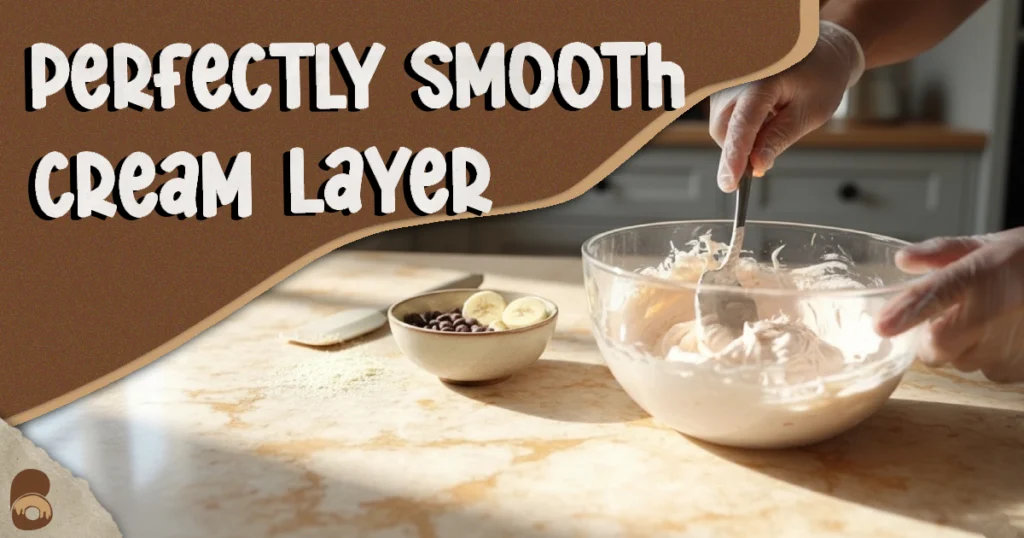
- Prepare the cream layer: Beat softened cream cheese with powdered sugar until smooth. Gently fold in half of the whipped topping, then smooth the mixture evenly over the chilled crust for a creamy base layer.
- Visual cue: Mixture should spread easily without lumps.
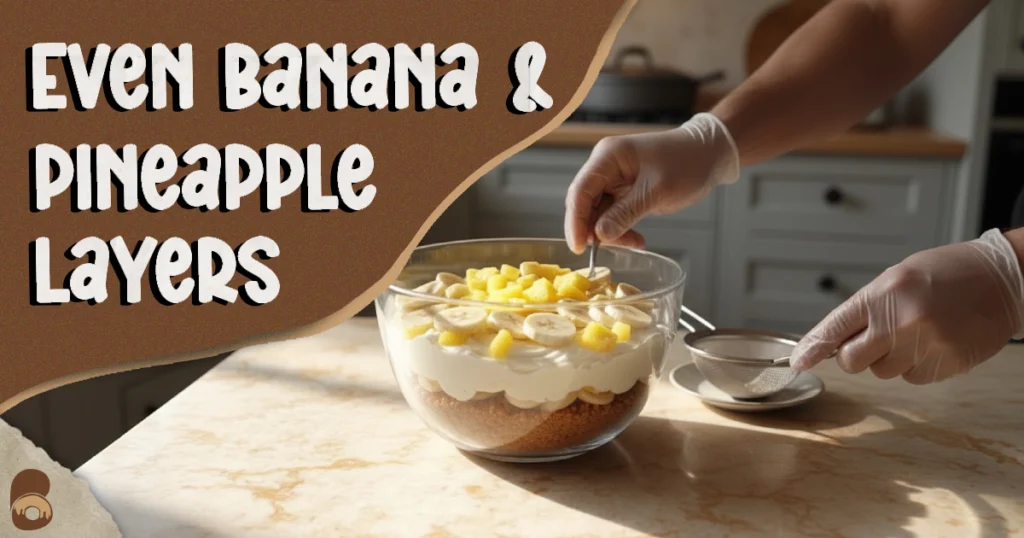
- Add bananas: Slice firm bananas and place them in a single layer over the cream mixture.
- Visual cue: Even coverage—no large gaps.
- Layer the pineapple: Add the pineapple layer by draining the crushed pineapple well—press gently in a sieve to avoid extra moisture—and spread it over the bananas.
- Visual cue: No puddles of juice—just moist fruit.
- Add strawberries: Arrange sliced strawberries over the pineapple.
- Spread the topping: Top the dessert with the remaining whipped topping, spreading it carefully to cover the fruit and create an even, creamy finish.
- Visual cue: The topping should look even and fluffy, with no gaps along the edges.
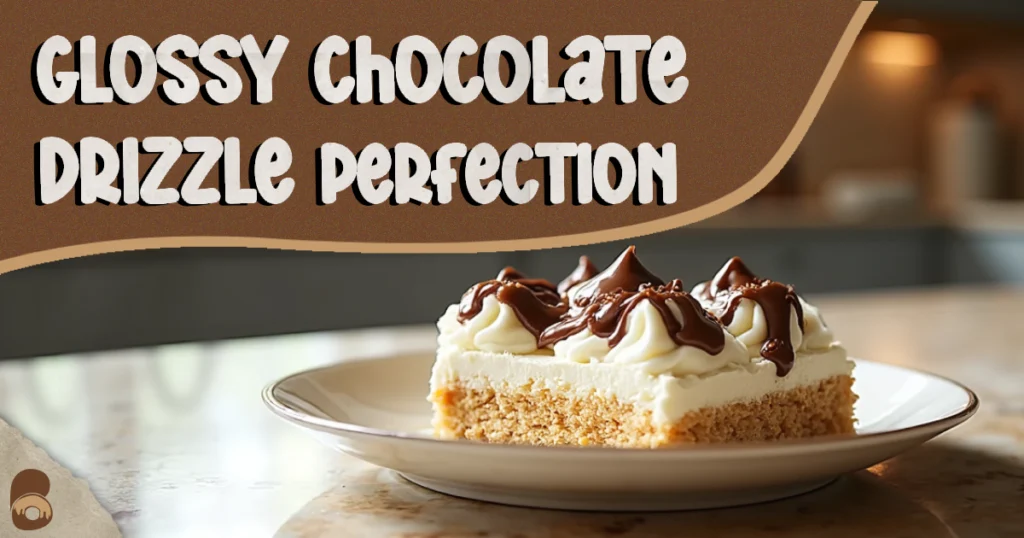
- Finish and decorate: Drizzle with chocolate syrup, sprinkle nuts (if using), and top with cherries.
- Chill thoroughly: Refrigerate at least 4 hours (overnight is best).
- Visual cue: When ready, the top should be set, and layers should hold together when sliced.
Troubleshooting & Fixes for Your No Bake Banana Split Cake Recipe
Even easy desserts can have hiccups. Tips to avoid common issues with your no-bake banana split cake recipe:
- Soggy crust → Add enough melted butter to coat crumbs and press firmly. Chill the crust before adding filling.
- Watery bananas → Choose bananas that are ripe enough to be sweet but still hold their shape when sliced.
- Runny layers → Fully drain pineapple—excess juice will cause slipping.
- Whipped topping collapse → Keep everything cold. If making whipped cream from scratch, stabilize it with gelatin, powdered sugar (contains cornstarch), or a commercial whipped cream stabilizer.
- Overly sweet flavor → Add a light sprinkle of flaky sea salt or use unsweetened whipped cream.
🔬 Science Bite: Why This Method Works
Behind every good dessert is a little food science.
- Fat + sugar create structure. The butter in the crust solidifies when chilled, binding crumbs together.
- Moisture management prevents collapse. Draining pineapple and using just-ripe bananas stop layers from turning watery.
- Chilling firms the cream layer. Cooling the fats and stabilizers in cream cheese and whipped topping gives the layers structure, helping slices hold their shape.
- Acid balances richness. Pineapple’s natural acidity cuts through creamy layers, preventing the dessert from tasting too heavy.
Ingredient Swaps & Dietary Notes
Want to make this dessert fit your household’s needs? Here are the tested swaps:
- Gluten-free → Use gluten-free graham crackers, digestive biscuits, or almond flour as a base.
- Dairy-free → Swap in almond or soy cream cheese, vegan butter, and coconut-based whipped topping to keep the dessert creamy.
- Nut-free → Omit the nuts entirely or use toasted coconut flakes for texture.
- Reduced added sugar → Use sugar-free whipped topping and opt for dark chocolate instead of syrup. Keep in mind that the natural sugars in bananas, pineapple, strawberries, and cherries remain.
These swaps still give you a creamy, layered result without compromising flavor.
Visual Cues for Doneness
Since there’s no oven, doneness is about texture and stability. Look for:
- Look: Whipped topping layer should appear matte and firm, not glossy.
- Smell: Dessert should smell sweet and fruity. Avoid bananas that smell sour or fermented.
- Feel: When sliced, pieces should stay intact. If layers slide, it needs more chilling time.
📦 Storage & Make-Ahead Tips
- Fridge: Store tightly covered for up to 3 days. Bananas may brown slightly after that.
- Freezer: Freeze uncovered for 1 hour, then wrap securely. Best eaten within 2–3 weeks for optimum banana texture; cream layers can last up to 1 month. Thaw overnight in the fridge.
- Make-ahead: Assembling the night before allows flavors to meld and gives the cake time to set for neat slices.
FAQs About No Bake Banana Split Cake Recipe
Q1: Can I make this no bake banana split cake recipe a day in advance?
Yes—you’ll actually get cleaner slices and better flavor after chilling overnight.
Q2: How do I stop bananas from browning?
Brush slices with a little lemon juice or pineapple juice before layering.
Q3: Can I freeze this banana split dessert and maintain its texture?
Yes—freeze before adding final toppings. Add syrup, nuts, and cherries fresh after thawing.
Q4: Is this closer to banana split pudding or cheesecake?
This banana split cake combines the creaminess of pudding with enough structure to slice neatly, striking a balance between soft and firm.
Q5: What if I don’t have Cool Whip?
You can make your own whipped cream. Stabilize it with gelatin, powdered sugar (contains cornstarch), or a commercial stabilizer so it holds during chilling.
🎉 Final Bite
This banana split cake delivers everything you want in a dessert—creamy layers, fresh fruit, and a nostalgic touch of chocolate and cherries—without the stress of baking. This recipe is simple enough for a weeknight dessert but still makes a lovely impression for guests or special occasions.
Follow me on Pinterest for more reliable bakes.
Simple, honest recipes — perfect results every time.
Share your experience and help others!
Tried this recipe? Leave a rating and make someone’s day tastier
Be the first to rate this recipe and help others discover it!