Rustic Italian Bread: Old-World Flavor Made Easy in Today’s Kitchen
Table of Contents
Table of Contents
The Soulful Simplicity of Rustic Bread
You probably remember a time when food was more than just fuel. It was a feeling—something that brought warmth to your heart and soul. Maybe it was your nonna kneading dough on a wooden board or the scent of bread drifting through your childhood home. That scent wasn’t just bread—it was comfort, nostalgia, and family all wrapped into one warm memory.
Even in your fast-paced life, there’s a simple pleasure in slowing down for something timeless. Making rustic Italian bread might sound like a task best left to bakers in Tuscan villas, but the truth is—it’s more achievable than you think. With the right ingredients, a bit of patience, and your hands (or a trusty mixer), you can bring that Old-World magic into your kitchen without needing a brick oven or a plane ticket to Florence.
What Makes Rustic Italian Bread So Special?
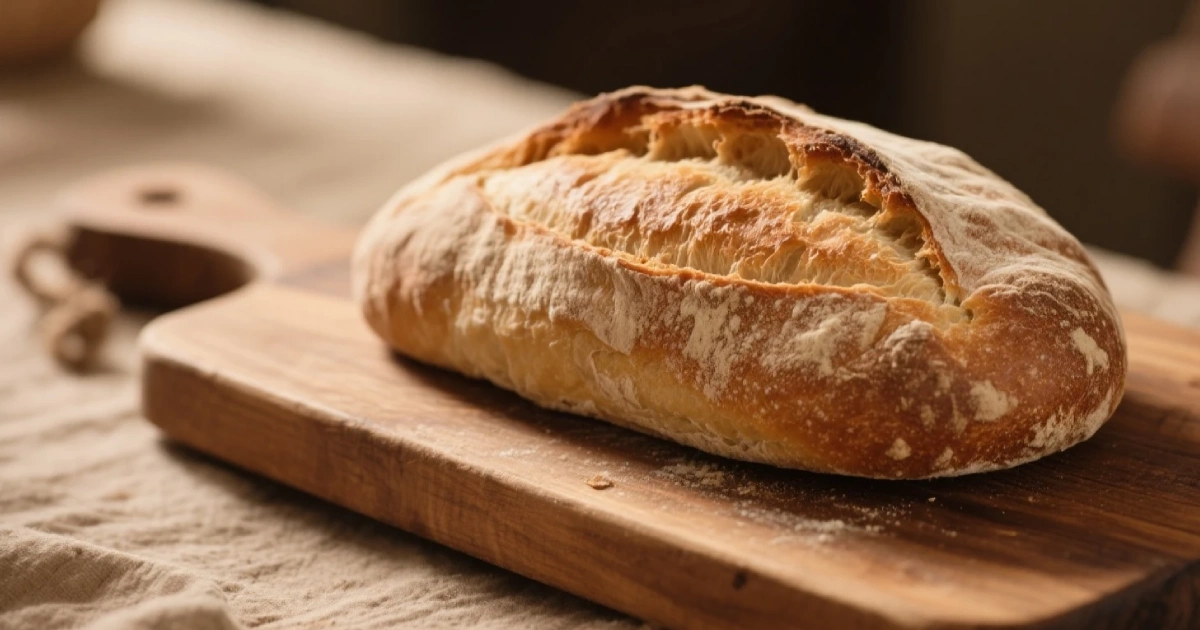
There’s bread—and then there’s rustic Italian bread. You know the kind: golden crust, chewy yet tender interior, and a flavor that seems to get better with every bite.
So what makes it stand out?
- Simple Ingredients: Just four core components—flour, water, yeast, and salt.
- No Frills, All Flavor: Its charm lies in its imperfections and natural rise.
- Fermented Flavor: The long fermentation time brings out deep, complex notes.
- Hardy Crust, Soft Crumb: You get the best of both textures in each slice.
It’s not meant to be perfect. It’s meant to feel handmade, because it is. And that’s exactly what gives it soul.
Essential Ingredients for Authentic Rustic Italian Bread
There’s no need to stock up on exotic ingredients—just a few kitchen staples will do the trick.
Ingredient Table
| Ingredient | Quantity | Notes |
|---|---|---|
| Bread flour | 3 ½ cups | High protein creates a chewy texture |
| Warm water | 1 ½ cups | Around 100–110°F |
| Active dry yeast | 2 ¼ tsp | Equivalent to 1 packet |
| Salt | 2 tsp | Enhances flavor |
| Olive oil (optional) | 1 tbsp | Optional: 1 tablespoon of olive oil can boost the dough’s richness and give the crumb a subtle softness. |
That’s it. You’re not overcomplicating things—you’re honoring a tradition that values simplicity.
Tools You’ll Need in Today’s Kitchen
Let’s be real—Italian grandmas didn’t have KitchenAids or Dutch ovens. But you do, and that’s a good thing.
Here’s what you’ll want on hand:
- Use a roomy mixing bowl to bring all your ingredients together with ease.
- A Dutch oven is your secret weapon for achieving that crisp, artisanal crust at home.
- Bench scraper – makes dough handling easier.
- Kitchen scale – for precise flour measurements.
- Proofing basket (optional) – helps shape and structure.
- Parchment paper – for easier transfers and cleanup.
You don’t need everything on this list, but having the basics will make your life a whole lot easier—and your loaf a whole lot prettier.
Step-by-Step Rustic Italian Bread Recipe
Time to roll up your sleeves. You’re not just baking bread—you’re crafting something with heritage baked in.
Step 1: Activate the Yeast
Pour the warm water into a big bowl and sprinkle in the yeast—let the magic start here. Let it sit for 5–10 minutes. You’re looking for froth on top—your yeast is alive and well.
Step 2: Mix the Dough
Add the flour and salt to your yeast mixture. Stir until everything is combined. The dough will be sticky. That’s normal. Sticky equals hydration, and hydration equals that gorgeous, airy crumb.
Step 3: Bulk Fermentation
Drape a moist towel or some plastic wrap over the bowl to keep the dough cozy during its first rise. Let it rest for about 90 minutes, or until the dough doubles in size. This is where the flavor starts developing.
Step 4: Shape the Dough
Sprinkle some flour on your counter. Turn the dough out and gently stretch and fold it a few times. Form the dough into a rustic ball or oval, then nestle it into a floured bowl or proofing basket.
Step 5: Second Rise
Give the shaped loaf about 45 to 60 minutes to puff up again before it hits the oven.
Step 6: Preheat the Oven
Place your Dutch oven in the oven and preheat to 450°F (232°C). Let the oven and Dutch oven preheat for a solid 30 minutes to ensure maximum heat retention.
Step 7: Bake the Bread
Transfer the dough (using parchment paper if needed) into your hot Dutch oven. Cover and bake for 30 minutes. Take the lid off and continue baking for 10 to 15 more minutes until the crust turns a rich, golden brown.
Step 8: Cool Before Slicing
This is the hardest part. Let your loaf rest on a wire rack for at least an hour before slicing. Cutting too soon messes with the texture.
Common Mistakes When Making Rustic Italian Bread (And How to Avoid Them)
Mistakes happen—even seasoned bakers slip up. But now you’ve got a cheat sheet.
What to Watch Out For:
- Water that’s too hot or cold kills yeast or stunts fermentation.
- Under-proofing creates dense, flat bread.
- Overdoing the flour can weigh down your bread and leave it drier than it should be.
- Skipping the preheat ruins the oven spring.
- Cutting into the loaf too soon traps moisture and gives you a sticky, underwhelming center.
Pro Tips:
- Always use a thermometer for your water.
- If your kitchen is chilly, place it near a warm appliance.
- Don’t be afraid of sticky dough—it’s a good sign.
Making Rustic Italian Bread Fit Into Your Modern Life
You don’t need to spend your whole day baking to get a gorgeous loaf. Here’s how you can fit bread-making into even your busiest day.
Smart Adjustments:
- Overnight Rise: Let the dough ferment in the fridge overnight. It deepens flavor and makes your next-day baking faster.
- Refrigerate After First Rise: Life’s busy. Toss the dough in the fridge and pick it up when you’re ready.
- Freeze Extra Loaves: Rustic Italian bread freezes beautifully. Pre-slice your loaf before freezing, and you’ll have quick-to-toast slices ready for busy mornings.
- Use a Bread Machine (Just for Kneading): Save your hands if you’re short on time or strength.
Variations on the Classic Rustic Italian Bread
This bread is amazing in its classic form, but why stop there? You can dress it up without losing its rustic charm.
Flavor Variations:
- Rosemary & Sea Salt: Mix in chopped rosemary; sprinkle sea salt on top before baking.
- Olive & Sun-Dried Tomato: Fold into the dough before the second rise.
- Whole Wheat Version: Swap out 1 cup of bread flour for whole wheat to add a nutty depth.
- Garlic-Infused Crust: Brush the top with garlic-infused olive oil before baking for a savory kick.
Let your imagination roam. The base is solid—you’re just adding your personal touch.
Serving Suggestions: What to Pair with Rustic Italian Bread
This bread doesn’t need much, but pairing it right can take it to another level.
Tasty Pairings:
- Extra Virgin Olive Oil & Balsamic Vinegar – classic and effortless.
- Minestrone or Tomato Soup – dunk away.
- Italian Cheese Board – think provolone, asiago, and mozzarella.
- Antipasto Platter – cured meats, marinated veggies, and your bread as the star.
- Bruschetta – fresh tomatoes, basil, garlic, olive oil.
You’ll find yourself reaching for this loaf at breakfast, lunch, and dinner. And possibly in between.
How to Store and Reheat Rustic Italian Bread
You went through all this effort—don’t let it go stale the next day.
Best Storage Practices:
- Room Temperature: Keep in a paper bag or wrapped in a towel for up to 3 days.
- To freeze, cut the bread into slices and seal them in freezer-safe bags—they’ll keep for up to three months. Reheat in a toaster or oven.
- Avoid the Fridge: It dries bread out faster than you’d expect.
- Reheat: 10–15 minutes at 350°F revives a loaf like magic.
Want crusty bread like day one? Splash a little water on the crust before reheating.
FAQs About Rustic Italian Bread
Q1: Is it okay to substitute all-purpose flour for bread flour?
Yes, but expect a slightly softer texture. Bread flour gives more chew.
Q2: Why didn’t my dough rise?
Check your yeast’s expiration date and the temperature of your water.
Q3: Can I add mix-ins like herbs or cheese?
Absolutely. Add them after the first rise to avoid slowing fermentation.
Q4: How do I get that bakery-style crust at home?
Use a Dutch oven. It traps steam, giving you the perfect crackly crust.
Q5: I’m new to baking—can I still make rustic Italian bread without trouble?
Not at all. It’s forgiving, flexible, and a great intro to artisan baking.
Conclusion – From Your Kitchen, With Love
When you slice into your first homemade rustic Italian bread, you’re not just tasting flour and water—you’re tasting history. You’re experiencing the same joy your ancestors felt when a simple loaf could feed a family and fill a room with laughter.
Don’t be intimidated by tradition. Embrace it. Let your modern kitchen become the canvas where old flavors are reborn. You have the tools, the time (even if it’s just a little), and now—the knowledge.
So preheat that oven, flour that counter, and let the scent of Italy drift through your home.